
Making Calls
Step 1: Make sure you are logged in to your Airtable and Dialpad accounts.
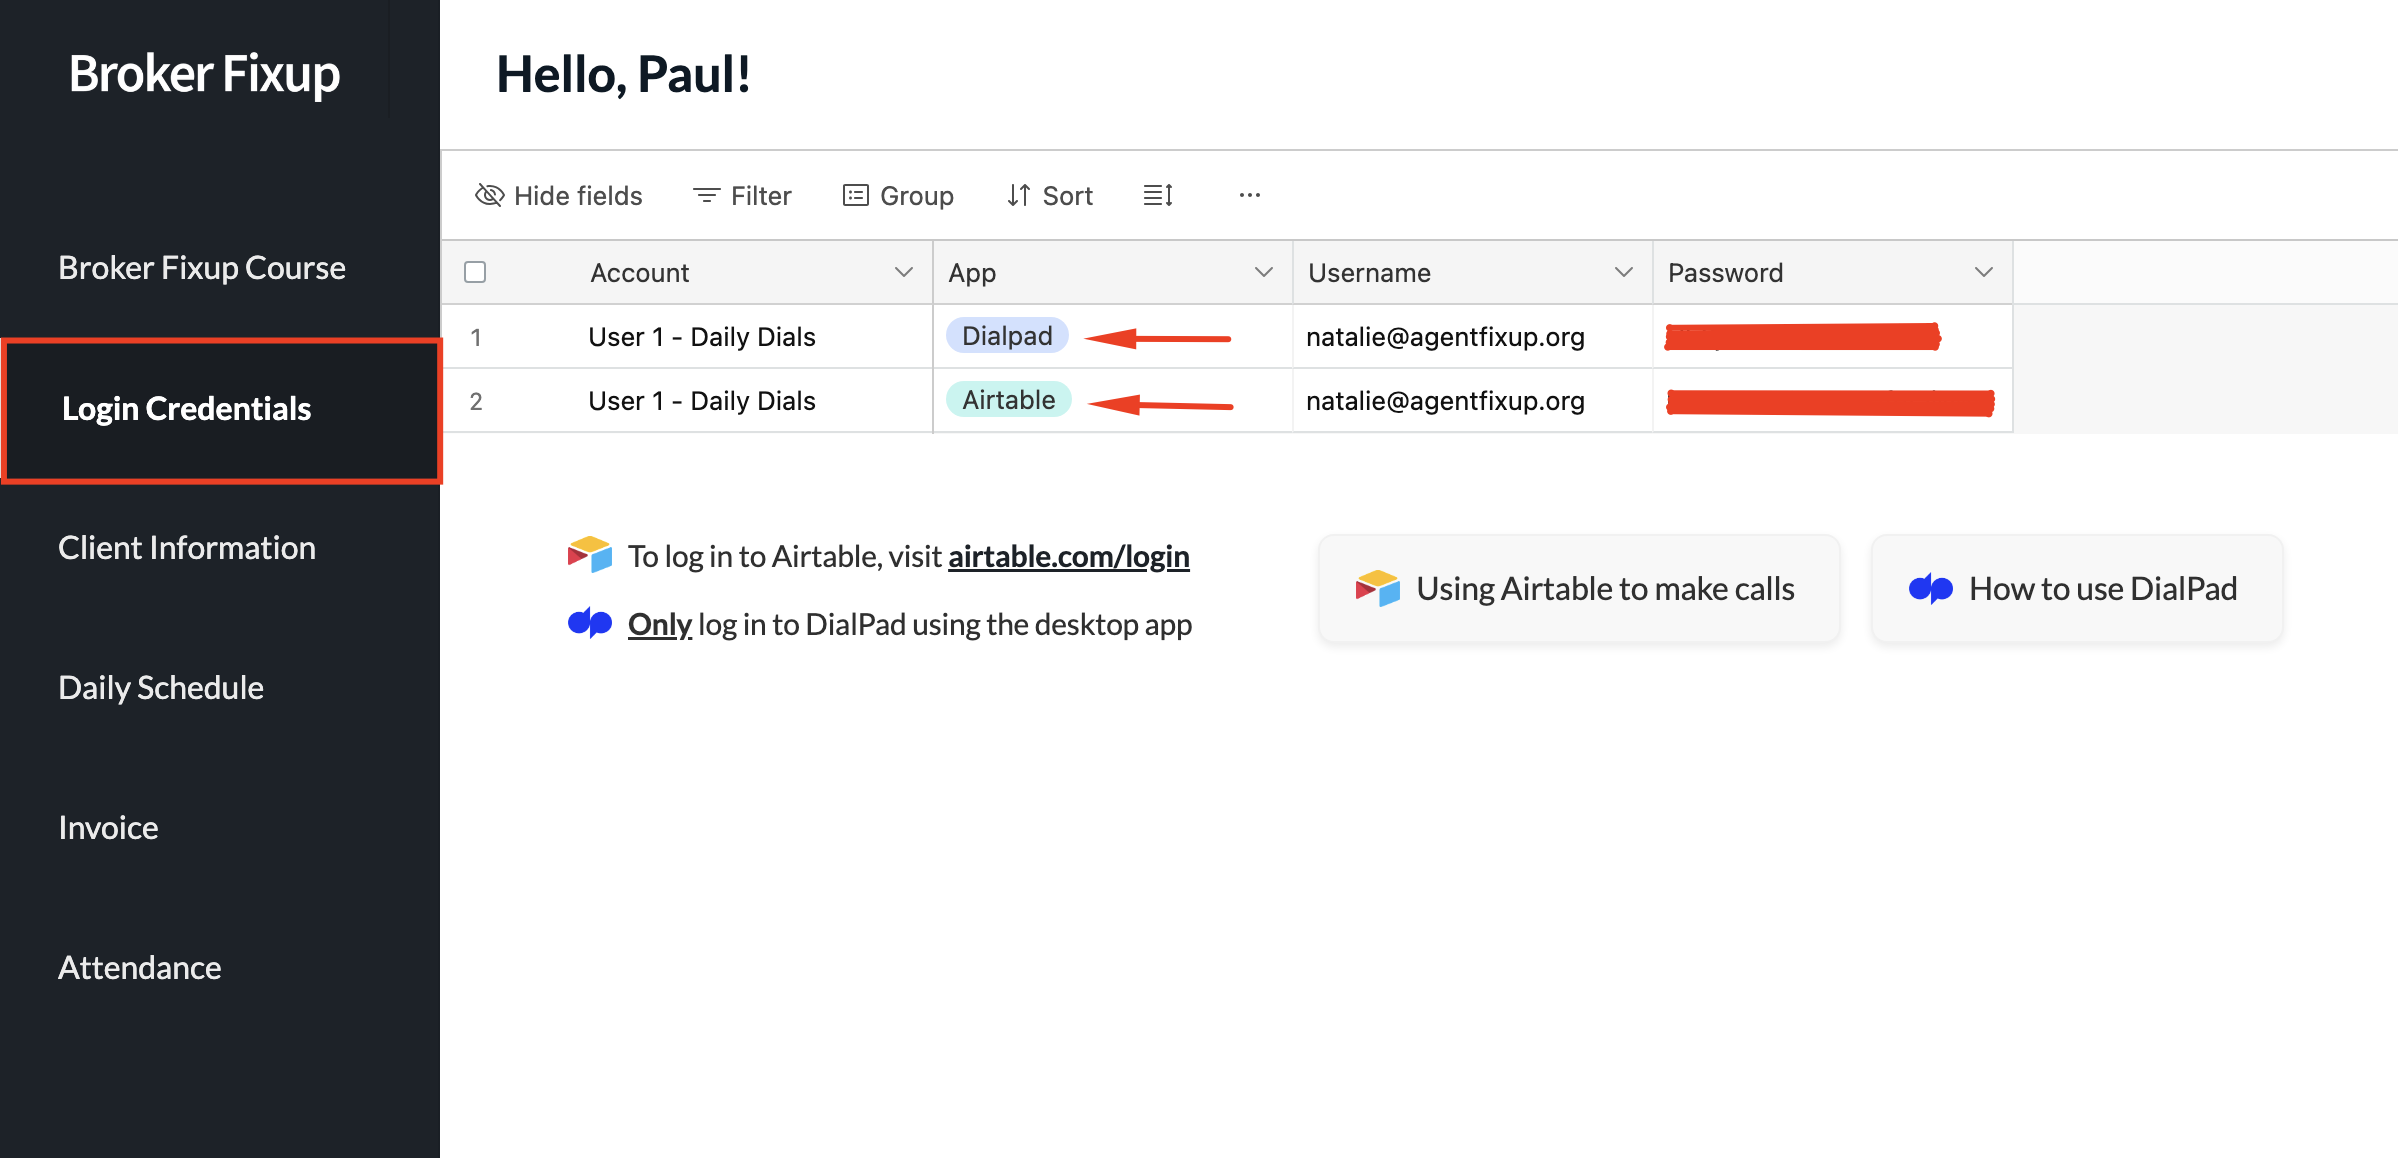
You can find your logins under the "login credentials" tab.
*Remember, you will ALWAYS be logged in to Dialpad via the desktop application.
Step 2: Go to the "Daily Schedule" tab to find the client to call for.
Once you have downloaded Dialpad on to your computer, please log in to your dialpad account with the login credentials found in your dashboard. They can be found in the section below.

Step 3: Confirm you are using the right phone number for the client.
To find the correct phone number for your client, click on the "Client Information" tab. You'll find the phone number for your client three columns to the right of the clients name.

↓ To change the number, on your DialPad desktop app, click on the phone emoji

↓ Click on the dropdown next to "Your caller ID displays as" and select the correct number for the client.

↓ Make sure you have changed the phone number in Dialpad to the correct number for the client.
Next, let's go ahead and fill out the "Before you call" form by copy/pasting the clients "Client ID" and their "Phone Number".
Finally, click "Confirm Number".
Next, let's go ahead and fill out the "Before you call" form by copy/pasting the clients "Client ID" and their "Phone Number".
Finally, click "Confirm Number".
*This is our way of confirming that you made sure to switch to the correct phone number

Step 4: Pull up the client's calling list
Go to the "Client Information" tab on the left. Find the client you are calling for and click on their calling list link under the "Calling List" column.

Step 5: You will be redirected to your calling base inside of Airtable.

The left side of your screen should look like this now that "Views" are no longer showing.

Next, click on "Extensions" so that you can see the call script.

You should now be able to see the script on the far right side of the screen

Your screen should look like the screenshot below where you can see the script on the right side of the screen and all of the columns to the left ↓ ↓ ↓
If the numbers are not purple, you are either not using the correct Chrome profile where the DialPad Extension is located OR you did not set up DialPad correctly.
If the numbers are not purple, you are either not using the correct Chrome profile where the DialPad Extension is located OR you did not set up DialPad correctly.

Watch our explanations of the above requirements
This will briefly show you what we are referring to above.
*It is mandatory to watch this video below. We can see if you do not.
Step 6: Let's go over how to make calls.
When you click on a number, you will notice that for a brief second, it opens up a new tab. This is completely normal and you don't have to do anything. The tab will close by itself in around 1 second.
*It is mandatory to watch this video below. We can see if you do not.
Step 7: Once the first call has been initiated.
You will notice that a purple box will appear on your screen. It shows the number you are currently are dialing and gives you the ability to hang up.
During the first call you make each day, you need to click the purple calling box and move it directly above the name and phone fields (as shown in video and image below).
During the first call you make each day, you need to click the purple calling box and move it directly above the name and phone fields (as shown in video and image below).
*It is mandatory to watch this video below. We can see if you do not.
The reason that we do this is because when the calling box is directly above the name and phone field, it makes it quicker and easier to hang up after each call.

Step 8: How we handle each call
There are three checkboxes we will use after calls depending on the outcome of the call. There is "No Answer", "Not Interested", and "Interested". Once you click one of these checkboxes, the record will immediately disappear.
If you ever happen to accidentally click the wrong checkbox, click "Ctrl-Z" and it will bring back the record.
If you ever happen to accidentally click the wrong checkbox, click "Ctrl-Z" and it will bring back the record.
*It is mandatory to watch this video below. We can see if you do not.
Let's go over what each each checkbox means
1. No Answer: When we make a call and someone doesn't answer OR the call goes to voicemail, we select "No Answer"

2. Not Interested: When we make a call and someone is Not Interested, Do Not Call, Wrong Number, OR the number is Disconnected, we click the box "Not Interested". We DO NOT need to leave any "Call Notes" for contacts that are in the "Not Interested" column.
*Remember, If you ever happen to accidentally click the wrong checkbox, click "Ctrl-Z" and it will bring back the record.
*Remember, If you ever happen to accidentally click the wrong checkbox, click "Ctrl-Z" and it will bring back the record.

3. Interested: When we make a call and someone is "Interested", we mark the checkbox for "Interested". This can be anyone who agreed to an appointment or even just agreed to receive an email. It is anyone who is remotely interested.
*Remember, If you ever happen to accidentally click the wrong checkbox, click "Ctrl-Z" and it will bring back the record.
*Remember, If you ever happen to accidentally click the wrong checkbox, click "Ctrl-Z" and it will bring back the record.

Interested (Explained): When we make a call and someone is "Interested", BEFORE clicking on the interested box, we need to confirm a few things.
1. Did they provide an email or confirm the email we have?
- If they provided a new email, we need to replace the current email we have.
- If they confirmed the email we have, we leave it be.
2. If they are an appointment
- We need to enter the appointment date and time in the "Appointment Time" field.
3. Taking notes during the call
- When you are on the phone with someone who might be a lead, use the Call Notes column to enter anything important. You DO NOT need to be detailed.
** IT IS MANDATORY that you work from "left to right", meaning add your "notes" first, then the "email address" second, then the "appointment time" third (if it's an appt.), then click "Interested" last.
*Remember, if you ever happen to accidentally click the wrong checkbox, click "Ctrl-Z" and it will bring back the record.

Let's watch a 5-minute video which demonstrates how we mark leads as "No Answer", "Not Interested", or "Interested"
*It is mandatory to watch this entire video. We can see if you do not.
Step 9: If you get an appointment, follow the instructions here for how to book an appointment on our clients calendar.
Step 10: Let us know in your group chat every single time you get a new lead!
Thank you! Your submission has been received!
Oops! Something went wrong while submitting the form.